Pulumi Tutorial: How to Store Your State in Azure
As cloud systems grow more and more complex, it also becomes more important to properly manage that infrastructure. If you are still provisioning resources for your production systems manually in the Azure portal, this Pulumi tutorial on Azure is for you!
If you are already familiar with Pulumi, and just want to learn more about how you can use Pulumi with Azure, skip ahead to Prerequisites for Pulumi with Azure.
The source code that accompanies this article is found on GitHub.
What is Pulumi?
This article will not be a detailed description of Pulumi. You can get that information from the Pulumi website. But in short, Pulumi is an Infrastructure as Code (IaC) platform for describing and managing cloud based infrastructures. There are of course other similar platforms available. For instance Terraform has more or less become de facto standard for IaC solutions.
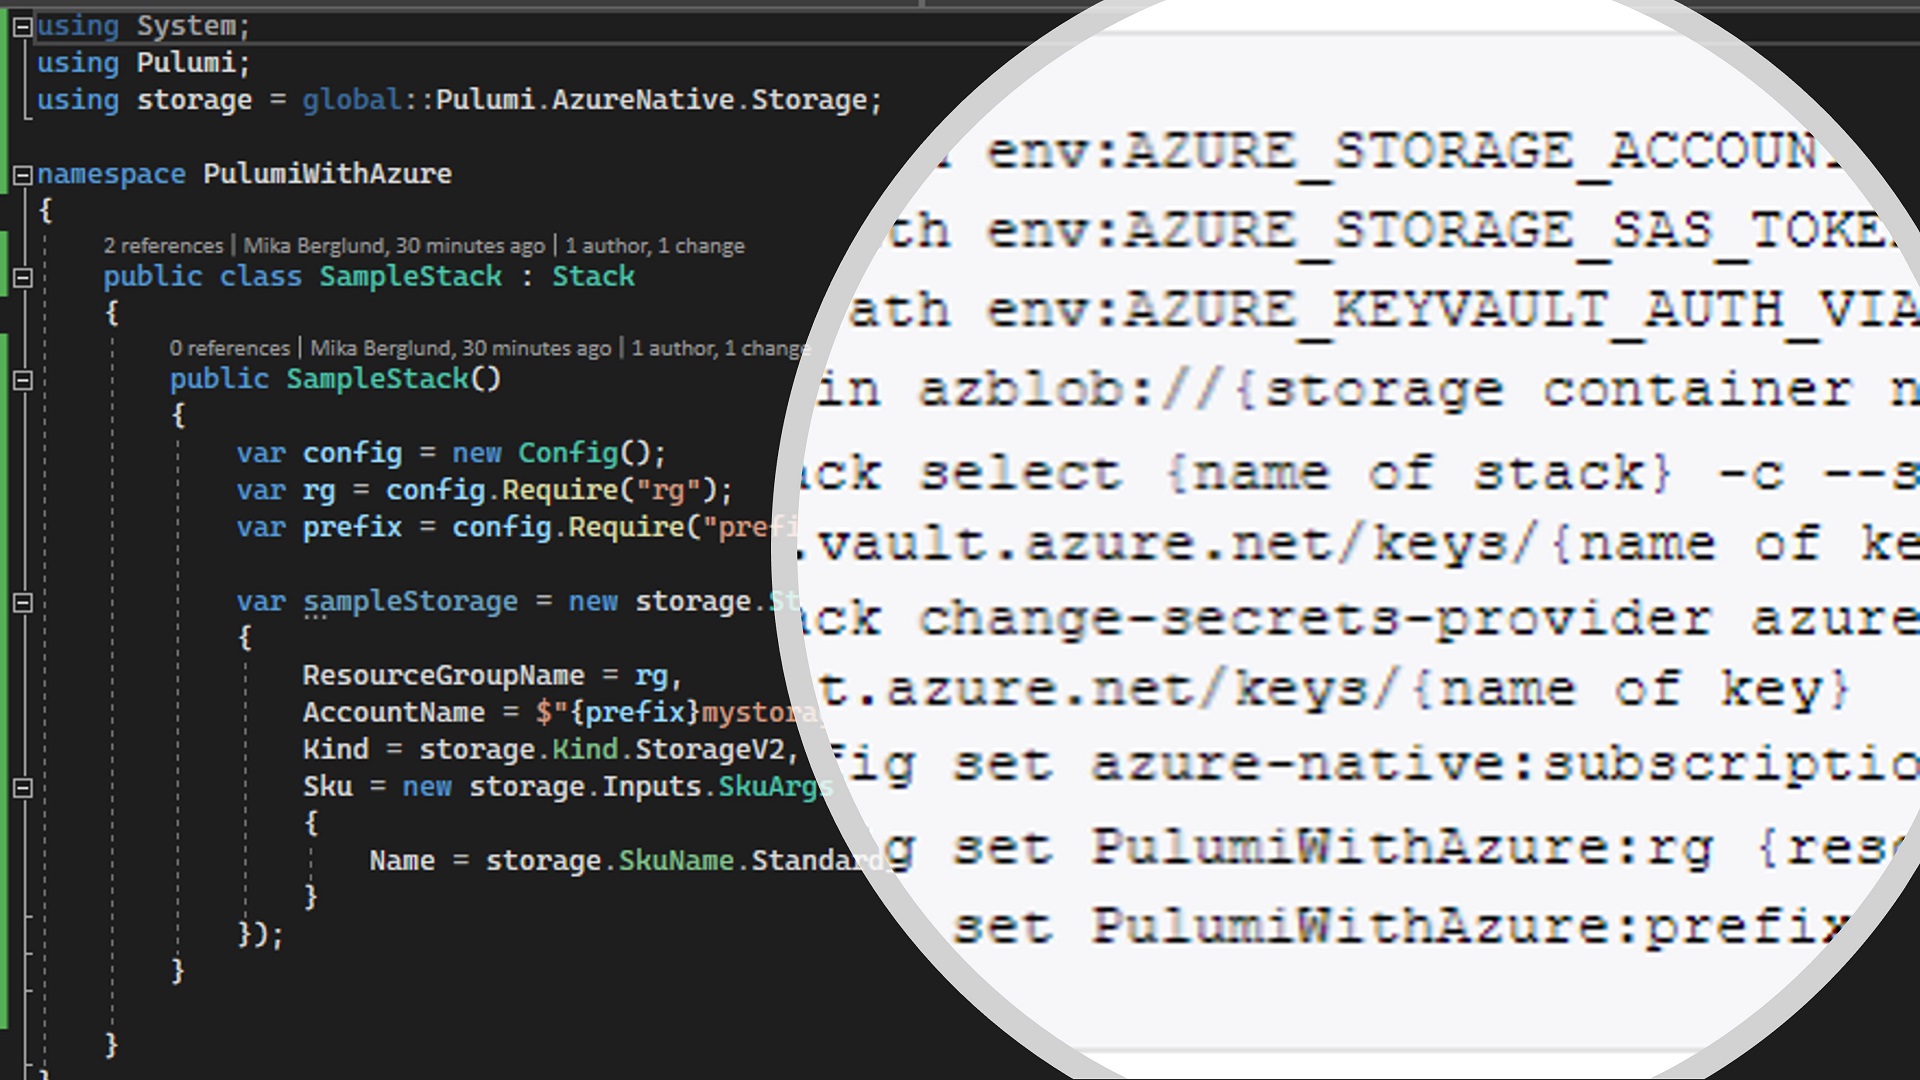
The way Pulumi differs from Terraform for instance is that in Pulumi you describe your infrastructure in C# or any other .NET language. So for instance, if you want to have a storage account in your infrastructure, you create an instance of the Pulumi.AzureNative.Storage.StorageAccount class.
And that is why I prefer Pulumi over Terraform for instance. I feel more comfortable writing C# than the script used by Terraform by default. Now don’t get me wrong. Terraform is great. I just find myself resorting to Pulumi when I need to automate infrastructure deployment.
About Stacks in Pulumi
Pulumi uses the term “Stack” when referring to the set of resources deployed as one unit. That is pretty descriptive right? But when referring to an instance of a deployed stack, Pulumi also talks about stacks, which is kind of confusing to me. Or then I have completely misunderstood it.
Anyway, the unit describing the resources that you deploy is called a stack. When you deploy it, you give it a name, which makes it a named stack, I guess.
Personally, I would call the names stacks environments, because that’s just what they are. Typical stack names are for instance dev, test, qa, prod etc. To me those are environments. Just so that you know.
Using Pulumi with Azure
If you’re completely new to Pulumi, I suggest you have a look at this Get Started with Azure tutorial on the Pulumi website. However, that tutorial does not provide any practical example on how to manage your state using Azure resources. In this article I’ll skip the basics of creating cloud infrastructures with Pulumi, because that is covered by the tutorial. Instead I focus more on how to set up state management using an Azure storage account.
State management with Pulumi and Azure
What is state then? In short, it is the mechanism with which Pulumi keeps track of what resources it has deployed to your target environment. Without that, Pulumi would not know what resources it should change, and what resources to completely leave untouched. For a more detailed description, see the State and Backends article in Pulumi docs.
By default, Pulumi uses its online service for state management. This service is hosted at app.pulumi.com. However, that service is free of charge only for individuals. If you want to share state with your team or with service principals, it will cost you a bit. Nothing wrong with paid services, though. Everything costs something at the end of the day. But the credit based billing in Pulumi can be a bit hard to understand, and what it actually will cost you. In some cases you might even have a requirement that prevents you from storing state data outside of your Azure subscription.
Prerequisites for Pulumi with Azure
There are a few things you need to set up in Azure before you can start provisioning infrastructure with Pulumi using an Azure storage account for state storage. These are described in the list below.
- A resource group – All of your resources will be deployed to this resource group. This is just to keep things simple. You could of course deploy resources to multiple resource groups.
- A storage account – The storage account that we use for storing the state.
- A Key Vault instance – This Key Vault instance will contain keys that are used to protect sensitive data in the stored state. I recommend you to use role based access control (RBAC) on the Key Vault instance, because it allows for more fine-grained security settings.
Configure the Storage Account for Pulumi with Azure
You need to have a container where Pulumi stores the state for every stack you deploy. One container is enough, but you might also consider having one container for each unique stack, just to keep them more separated. With different containers, you could also manage security for each deployed stack more efficiently. In this sample, I’ll go with just one container and call it pulumi-state.
You also need to create a SAS token that grants read, write and delete access to the container. If you use multiple containers, you should also have multiple SAS tokens.
Even though not required by Pulumi to work, it’s a good idea to store the tokens in the Key Vault you created, and set their expiration dates to match the expirations you chose for the SAS tokens.
Configure Key Vault for Pulumi with Azure
Pulumi can be configured to use Key Vault to store the keys that it uses to protect sensitive data in the state. Even though you could share one key for every instance of a stack you deploy, you should have one key for each. Typically, your developers can provision a dev environment, and sometimes also a test environment. But a production environment is more locked down. With different keys in Key Vault and with role based access control, you can grant access to each key separately.
In this article though, since I only provision one instance of the stack, I only have one key.
When you have created the key, make sure that you grant access to it to all principals you want to use for deploying your stack. Both individuals and service principals.
Deploying Your Pulumi Stack to Azure
Now that you have your prequisites and configuration sorted, it’s finally time to start the deployment. You do that with a bunch of Pulumi commands in a console window. In this sample below, I use a PowerShell console (not Windows PowerShell).
I’ll first list all the commands together so you’ll get a better overview of things. I’ll then go through each of the lines in more detail below the script.
az login
Set-Item -Path env:AZURE_STORAGE_ACCOUNT -Value {storage account}
Set-Item -Path env:AZURE_STORAGE_SAS_TOKEN -Value "{SAS token}"
Set-Item -Path env:AZURE_KEYVAULT_AUTH_VIA_CLI -Value $true
pulumi login azblob://{storage container name}
pulumi stack select {name of stack} -c --secrets-provider azurekeyvault://{name of key vault}.vault.azure.net/keys/{name of key}
pulumi stack change-secrets-provider azurekeyvault://{name of key vault}.vault.azure.net/keys/{name of key}
pulumi config set azure-native:subscriptionId {subscription ID}
pulumi config set PulumiWithAzure:rg {resource group name}
pulumi config set PulumiWithAzure:prefix {name prefix}
pulumi up
Command Descriptions
The list below provides more detailed description for the commands above.
- Use the Azure CLI to log your console session in to your Azure subscription.
- Set the name of the storage account (
{storage account}) you will use for state storage. - Configure the SAS token (
{SAS token}) that grants Pulumi access to the container you are using for state storage. - Instruct Pulumi to log in to Key Vault with the identity obtained in step #1.
- Log in to Pulumi and asking it to use the Azure storage account in command #2 and the container you specify in
{storage container name}for state storage. - Specify the name of your stack in
{name of stack}. The stack will be created if it does not exist. If the stack is created, it will be configured to use the key {name of key} in Key Vault {name of key vault} to protect sensitive data stored in the state. - If the stack already existed, this command will instruct Pulumi to use the key
{name of key}in Key Vault{name of key vault}to read and write sensitive data in the state. - Set the ID of the target Azure subscription to
{subscription ID}. - Specify the name of the resource group to
{resource group name}to which to deploy resources. - Set a prefix for all resources to be deployed to
{name prefix}. - Deploys the stack as configured.
Conclusion
That covers the basics of what you need to do to store your Pulumi state in an Azure storage account. Now you can start adding your resources in a real-world situation. When you deploy your stack from an automated pipeline like Azure Pipelines, you might need to adapt the commands above slightly. The basics still apply though – You need a key in a Key Vault, a storage account for state storage and a SAS token to grant access to the storage account. And the principal running the pipeline needs to have access to the Key Vault and have at least contributor access to the resource group you are deploying to.
Be also sure to check out the source code accompanying this article. The source code is available on GitHub.
Hope this helps you a bit on the way.

0 Comments