Microsoft Teams App With Blazor Server or Blazor WebAssembly

Update! After writing this article, I got more and more excited about writing Teams apps with Blazor. So I started on working on Blazorade Teams, which is an open source library for Blazor applications for super easy development of Microsoft Teams Apps. To learn more, visit the announcement article.
I am quite a big fan of Blazor, as you might have read in previous articles. I am also quite keen on Microsoft Teams, even though it still lacks some of my top-5 wishes (late November 2020). So I wanted to figure out what I need to build a Microsoft Teams app with Blazor.
This article describes the basics for structuring and building a Microsoft Teams tab application as a Blazor Server or Blazor WebAssembly application. The source code is available on GitHub.
Introduction
There are a lot of samples already out there that show you how you create a Microsoft Teams tab as a Blazor application. However, they all fail in leveraging the benefits that Blazor offers. Instead, these samples are just mashups of HTML, JavaScript and C# code without any structure. Quite frankly, I would not use them as basis for any production applications.
This triggered me to set out to try and write a Microsoft Teams Tab app with Blazor with proper structuring, and that would work as foundation for production grade applications.
Design Targets
So, I wanted to write something that I could also use for writing for real-world, production-grade applications. I wanted the sample application to:
- Work both as Blazor Server or Blazor WebAssembly
- Keep the plumbing and boilerplate away from the application
- Allow a developer to write the application only in C# without having to call any JavaScript code
- Handle communications with the Teams SDK in a “Blazor friendly” way
Structuring a Microsoft Teams App With Blazor
So to meet these targets, I decided to split the solution into the following separate projects.
- SharedComponents – A Razor component library containing the components that handle the communications with the Teams SDK.
- TeamsAppServer – A Blazor Server application making use of the components in
SharedComponents. - TeamsAppWasm – A Blazor WebAssembly application making use of the components in
SharedComponents.
All of the plumbing and verbose communications are done in the SharedComponents component library. To use this library in your application, you just need to:
- Add a reference to the library
- Add two lines of script to your main page template
- Create your application page
- Create a login page
- Configure your application
I’ll go through these in more detail in the chapters below.
Add a Reference to the Library
This is pretty obvious, so I will not spend too much time on this. Just include the library in your solution and add a reference to it from your Blazor application project.
Add Script References
The components in the SharedComponents library require two script files to be loaded on the page. The first one is the Microsoft Teams JavaScript SDK. The second script file is the one included with the SharedComponents library. There are certain functionality that you cannot call directly from a Blazor component using JavaScript interop. This functionality is supported by the script included in the library.
The script references are shown below.
<script src="https://statics.teams.cdn.office.net/sdk/v1.7.0/js/MicrosoftTeams.min.js"></script>
<script src="_content/SharedComponents/blazor-teams.js"></script>
If you are writing a Blazor Server application, you add these script references to the Pages/_Host.cshtml file. For Blazor WebAssembly applications, the script references go to wwwroot/index.html by default. If course you can have other arrangements, but this is how it works by default.
Create Your Application Page
To keep things simple, we’ll just create one application page that represents a personal tab in Microsoft Teams. Personal tabs don’t need a configuration page, so we have just one single page.
To demonstrate a very simple case for using the SharedComponents library, our personal tab application will only show context information for the logged on user. We’ll create the page Pages/Personal.razor, which actually works for both Blazor Server and Blazor WebAssembly. The complete page looks like this.
@page "/personal"

<TeamsApplication>
    <ApplicationTemplate Context="ctx">

        <h3>Personal Page (Server)</h3>

        <ContextViewer Context="ctx?.Context"></ContextViewer>

    </ApplicationTemplate>
</TeamsApplication>
It can’t be much simpler than that, can it? It is still a complete Microsoft Teams Tab app with Blazor. When rendered, the TeamsApplication component will take care of the following for you.
- Initialize the application (getting rid of the loading indicator and actually displaying your application)
- Getting the context for the current user
When all of this is done, it will package that into a BlazorAppContext object and render the ApplicationTemplate template that you’ve defined in the code above. The context object passed to the template contains all of the information that has been resolved for you.
The ContextViewer component is just demonstrating how you can utilize the context in your ApplicationTemplate implementation. The context information that the Teams SDK provides is documented on the Context interface.
Customizing the Login Template
If you want to show your own template for users that need to sign in, you can do so like this.
@code {
    TeamsApplication app;
}

<TeamsApplication @ref="this.app">
    <SignInTemplate Context="ctx">
        <p>This application requires that you first log in. Click on the button below.</p>
        <button @onclick="async () => { await this.app.SignInAsync(); }">Log in as @ctx.Context.LoginHint</button>
    </SignInTemplate>
</TeamsApplication>
However, this is not required, and will fall back to a default template if you don’t specify your custom template.
Create a Login Page
It is important to remember that the context information MUST NOT be used for authentication purposes. If you need to authenticate the user, you need to do it properly with the help of Azure AD.
The simplest way to do this is to launch a login dialog when you need to have the user authenticated. This is also supported in the TeamsApplication component. To require the user to log in before the application is displayed, you simply set the RequireAuthentication parameter to true, as shown below.
<TeamsApplication RequireAuthentication="true">
    ...
</TeamsApplication>
If your user is not logged in, this will show another template that you may provide your own implementation for. If you don’t specify one, like in the sample above, a default template will be shown. Your ApplicationTemplate template will not be rendered if the application requires authentication, and the user has not signed in.
The login process in this sample requires that you have a login page in your application. With the default configuration, the page is located at Pages/Login.razor. The complete source for this page is shown below.
@page "/login"

<TeamsApplication CheckHost="false">
    <ApplicationTemplate Context="ctx">
        <LoginDialogHandler Context="@ctx?.Context">
            <p>
                Processing authentication for @(ctx?.Context?.LoginHint)...
            </p>
        </LoginDialogHandler>
    </ApplicationTemplate>
</TeamsApplication>
Here too, you use the TeamsApplication component with the LoginDialogHander component in the application template. This way, you will get the context information from Teams. The context information includes the login name for the user logged in, which you then can use as login hint. Using a login hint will in most cases make the login process easier for your user, since they typically don’t have to enter their user name and password again.
When the user clicks on the sign in button, the login dialog opens and the login process starts. When the process is completed, the dialog closes and your application is rendered with the ApplicationTemplate you have defined.
Configure the Application
The final step to take care of in your application is to configure it. The most important settings you need to configure is the client ID of your application, and the ID of the tenant that you have registered your application in. You add your configuration to the appsettings.json file (or an environment specific like appsettings.Development.json). You find more detailed documentation on the contents of that file in this document in the code repository. The documentation applies to both Blazor Server and Blazor WebAssembly hosting.
Register the Application
To get the client ID for your application, you first need to register the application in your Azure AD tenant. This application represents your Microsoft Teams Tab app with Blazor.
I will not dive deep into how you register applications in Azure AD. That is the subject of another article. For now, I’ll just refer you to this quick start from Microsoft. There are a few things to point out here though.
Authentication
Make sure you have registered the Web platform with the proper reply URL. The reply URL should be the full URL to your login page. If you are running locally in development, the reply URL would be something like https://localhost:5001/login.
Also make sure that you have selected which types of tokens you want your application to receive. You need an access token to access an other application or API, like Microsoft Graph for instance. An ID token simply contains the identity information for the user.
API Permissions
You also need to configure what your application want’s to do on behalf of the signed in user. You do this in the API permissions section for your application registration. By default, applications have the User.Read delegated permission, which is needed for an application to sign users in.
If you are creating an application that does more than just signs users in, then you need to add all the permissions that your application needs. When the user signs in to your application for the first time, then will then have to consent to your application’s permission requests before your application will be issued an access token.
Testing the Application in Teams
OK, so your application is now ready. Now it’s time to run it inside of Teams. If you tenant is configured to allow Teams applications to be side-loaded, you can run your application even from localhost.
To do this, you need to install the App Studio Teams application. When you have installed the application, you will see the icon in the application bar in Teams.
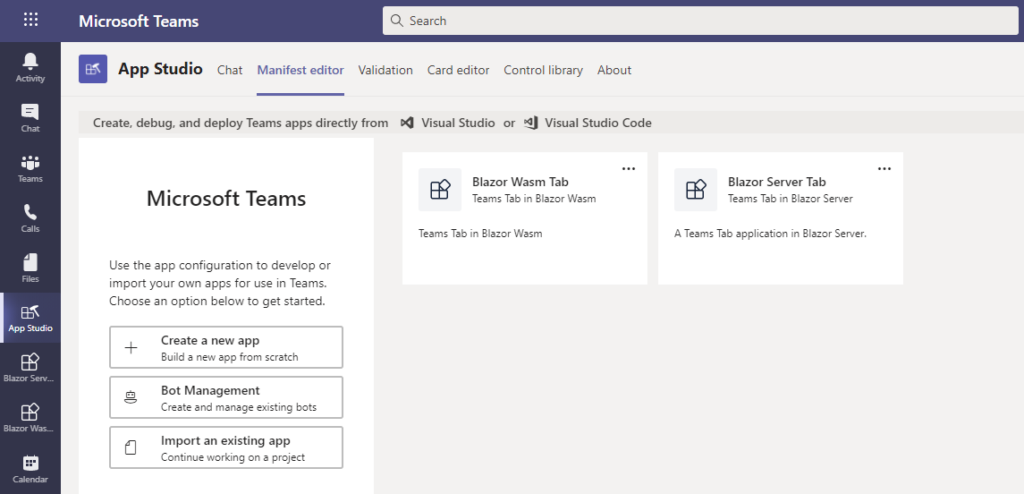
Select the Manifest editor tab, and create a new application. In the screenshot above I have two separate application. One for the Blazor Server app, and one for the Blazor WebAssembly app.
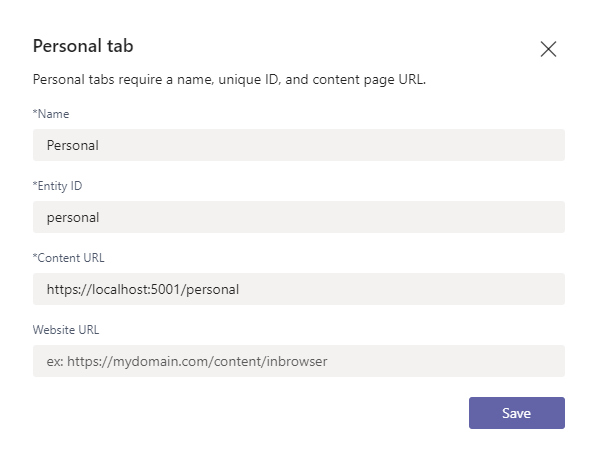
In your new app manifest, add the required information. Then add a new personal tab, and specify the full URL to the personal tab page you created earlier.
That’s all you need to do. Then just save the tab and scroll the menu down to Finish / Test and distribute as shown below.
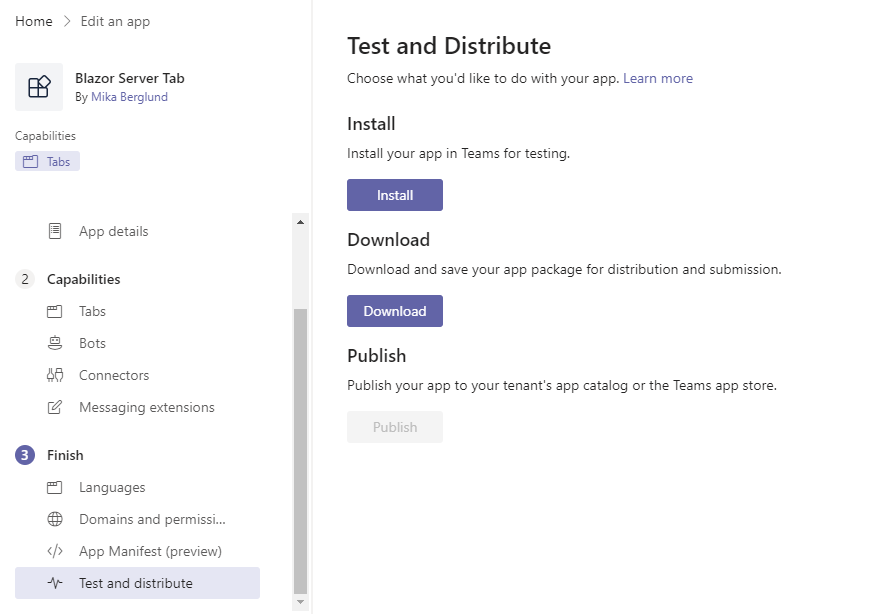
If your Install button is disabled, then application side-loading is not enabled in your tenant. To enable side-loading, you need to add a policy that allows custom apps in your tenant. You do this in Teams admin center under Teams apps / Permission policies, as shown below.
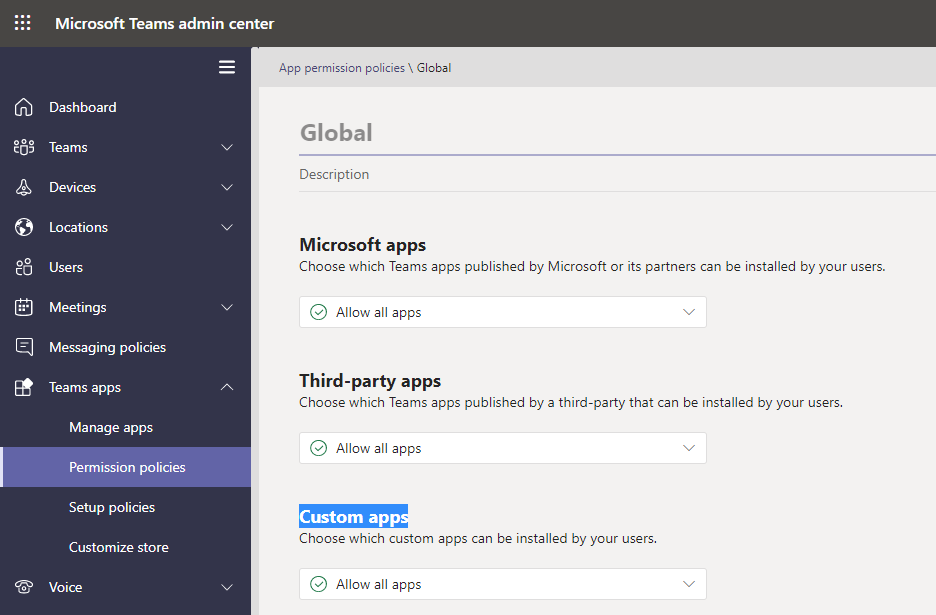
It can take even a couple of hours before the changes take effect, so be patient.
Summary
This is a very simple example of how you can make the most out of the features that Blazor gives you in order to make your Microsoft Teams Tab app with Blazor as simple as possible. Of course this is not yet complete, but I think it will give you a pretty good idea what you can do with Blazor in Teams.
One thing that I would focus on would be to get a single sign-on experience for the user. As the user is already signed in to Teams, why should they have to separately log in to your application? Especially if they already have used it before, and consented to all the permissions your application requires.
I looked into this a bit while working on this sample application. However, it would have made things in the background a bit more complicated, so I decided to keep things as simple and clear as possible. This way the main idea is more prominent in the sample, which is all about letting the features of Blazor do the heavy lifting in order to keep your application as simple and clear as possible. Because that’s what we all developers want, don’t we? Simple, clear and understandable applications that we can be proud of handing over to coworkers too, right?
If there’s something that is not clear in this article, or if there is something you want me to clarify, please write a few lines in the comments below.


2 Comments
Angelos · May 16, 2022 at 15:46
Good Day. Thanks for this great article. Will this work on Mobile version of Teams?
Mika Berglund · June 2, 2022 at 08:22
I did some preliminary tests on mobile devices with Blazorade Teams; and found some problems, at least on Android devices. However, then Microsoft added support for Blazor in the Teams Toolkit (TeamsFx), so I thought I would focus on other areas within Blazorade. So, Blazorade Teams is a bit stale, I would guess, and it’s fair to say that it probably will be refocused on extending the Teams Toolkit, if there are areas in TeamsFx that might need extending.