PnP Dev General Community Call Demo, Feb 4 2021

A while after I published my previous post on social media, I was invited to give a demo on it in a coming PnP Dev General community call. That post talks about Blazorade Teams, and how it makes app development for Microsoft Teams with Blazor so much simpler.
This article is the script for that demo. By following the steps outlined in this article, you can easily replay the demo by yourself.
In this demo I’ll be using the Blazorade Teams component library, which is still in preview. When that library comes out as a stable release, I’ll be updating this script so that it is in sync with the released library. This article is currently written for the 1.0.0-preview1 version.
Prerequisites
To be able to run the demo yourself, there are a few prerequisites that you need to take care of first.
- Visual Studio 2019
- Blazor Server App with .NET 5
- Enable custom apps in Teams on your tenant
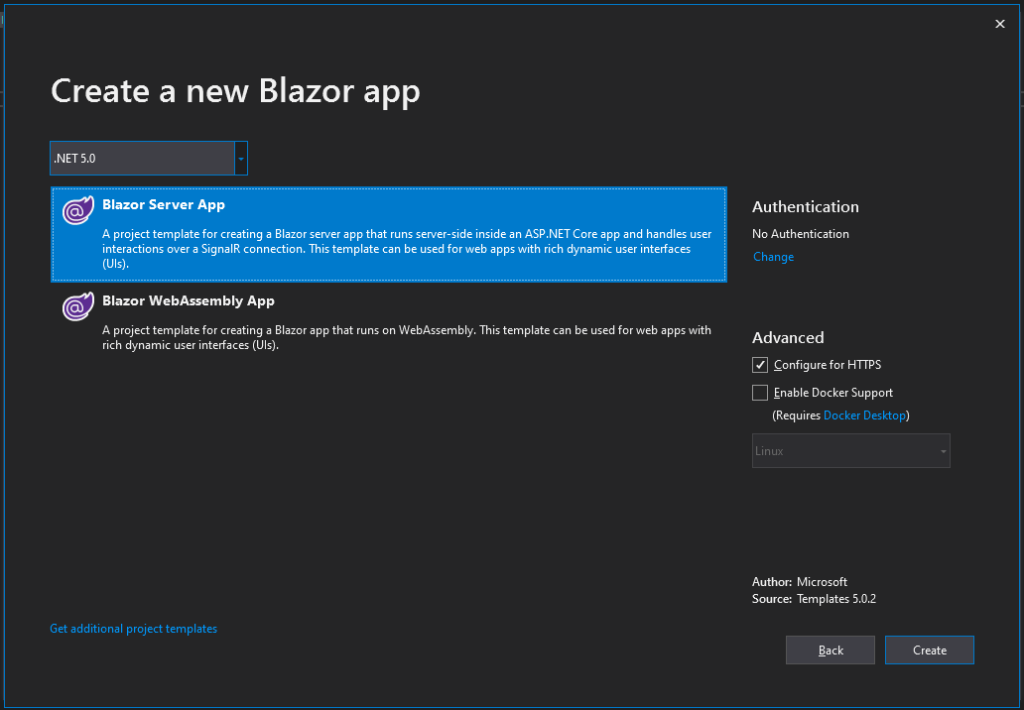
You can with some modifications run this demo with Visual Studio Code as well as Visual Studio for Mac. All of these options are supported tooling for Blazor development. So, you should be able to get to a project creation dialog that looks something like this.
Create the Blazor Application
The first thing you do is to create the Blazor application. Make sure you target it for .NET 5. This demo is built as a Blazor Server application, but you could just as well build it as a Blazor WebAssembly application. Blazorade Teams supports both.
Normally, you would probably strip away a lot of the default stuff that comes with the template right out of the box, but in this demo we’ll focus just on the most important stuff, which is what you need to do to get the application working in Microsoft Teams. You can then modify it to suit your needs best.
Register App in Azure AD
Since we are going to authenticate users in our application, we need to register the application with Azure AD. To do that, we’ll follow the steps below.
- Log in to the Azure AD portal
- Go to the Azure Active Directory blade and select App registrations under Manage
- Click the New registration button
- Give the app a name
- Select Accounts in this organizational directory only under Who can use this application or access this API
- Under Redirect URI, select Single-page application (SPA) and add https://localhost:5001/login as URI
- Click Register
Go to the Overview section of the application registration, and copy the Application (client) ID for the application. You’ll need it in the next step.
Add Settings to the Application
Open the appsettings.Development.json file from your Visual Studio project, and add the following JSON to the settings file.
{
    "teamsApp": {
        "clientId": "<Application (client) ID",
        "tenantId": "<Your tenant>.onmicrosoft.com"
    }
}
Add Reference to Blazorade Teams
Next what we’ll do is that we’ll add a reference to the Blazorade.Teams Nuget package. As of writing, the package is still in preview, so you need to make sure that you also search for prereleases.
When you’ve added the reference, open up the _Imports.razor file, which is in the root of your application. Add the following using statements to the file.
@using Blazorade.Core.Components
@using Blazorade.Core.Interop
@using Blazorade.Teams.Components
@using Blazorade.Teams.Configuration
@using Blazorade.Teams.Interop
@using Blazorade.Teams.Model
Configure Application Startup
Open up your Startup.cs file, and add the following code to the end of the ConfigureServices method.
services.AddBlazoradeTeams((sp, options) =>
{
    var root = sp.GetService<IConfiguration>();
    var config = root.GetSection("teamsApp");
    config.Bind(options);

    options.LoginUrl = "/login";
    options.DefaultScopes = new string[] { "User.Read" };
});
The DefaultScopes option is not required, but can be handy if you are building an application with multiple pages that all require the same set of scopes. The default scopes are used if other scopes are not explicitly specified when acquiring an access token for your application.
Create a Login Page
If you want to use authentication in your application, Blazorade Teams needs to have a login page. This is a page that corresponds to the URL you specified in the LoginUrl option in your Startup class above.
Open up the Pages folder in your application, and add a new Razor component to it. Let’s call it Login.razor. Then clear all contents from the page and paste in the following code.
@page "/login"

<LoginDialogHandler>
    <p>
        We are processing your login. You might need to enter your
        password or consent to permissions that this application needs.
    </p>
</LoginDialogHandler>
The LoginDialogHandler component will take care of everything for you. The component allows you to add content to it, which will be displayed in the login dialog.
Create the Personal Tab Page
In this demo we’ll create the simplest tab application, which is a personal tab application. A personal tab application can be installed by users to their left panel in the Teams client.
This demo tab application will just display all of the information that Blazorade Teams provides your application. With this information it is then pretty trivial for you to further build your application into what it needs to be, for instance accessing Microsoft Graph or similar.
To create a personal tab, we need a page in our Blazor application. Open up the Pages folder in your Blazor application, and add a Razor component to it. Let’s call it Personal.razor. Then, paste in the following code. This code listing is the complete implementation of the page.
@page "/personal"

<TeamsApplication RequireScopes="User.Read">
    <ApplicationTemplate Context="ctx">
        <h2>Information for @ctx.Context.UserPrincipalName</h2>

        <h3>Teams Context</h3>
        <ul>
            <li>Theme: @ctx.Context.Theme</li>
            <li>Client Type: @ctx.Context.HostClientType</li>
            <li>Locale: @ctx.Context.Locale</li>
            <li>Login Hint: @ctx.Context.LoginHint</li>
            <li>User License Type: @ctx.Context.UserLicenseType</li>
        </ul>

        <h3>Authentication Result</h3>
        <ul>
            <li>Expires On: @ctx.AuthResult.ExpiresOn</li>
            <li>Access Token: @ctx.AuthResult.AccessToken</li>
            <li>Scopes: @string.Join(", ", ctx.AuthResult.Scopes)</li>
            <li>Id Token: @ctx.AuthResult.IdToken</li>
        </ul>
    </ApplicationTemplate>
</TeamsApplication>
This completes the development part of the demo.
First Test Run
You can run test run your application, just to make sure that you don’t get any compilation errors or something like that. Before you start, you should change how you run your application. By default, Blazor applications, like all ASP.NET applications, run by default with the IIS Express profile. Typically, I change the profile and use the project instead, as shown in the picture below.
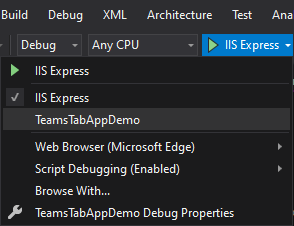
Change from IIS Express to the name of your project. This way, you will get a more consistent port number. Instead of a random port number under IIS Express, you will always run on the port 5001. Now, when you start your project, you should see something similar to this.
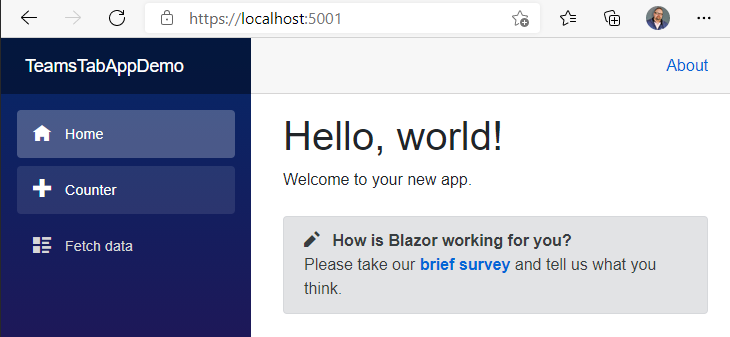
So, that’s a totally standard, out-of-the-box Blazor application. That’s fine. Your Teams application is found on the /personal page, which is why you don’t see anything on the front page.
Create and Deploy the Manifest for the Application
To be able to run your application in Teams, even locally, you need to create a manifest for the application, and deploy to Teams. To do this, you can use App Studio, which is a very handy Teams application.
After you’ve installed App Studio, start it and go to the Manifest editor tab, and create a new app. Then follow the steps below.
- Enter the following information
- Short name for the app
- App ID
- Package name
- Version
- Short description
- Full description
- Company name
- Website
- URL for privacy statement. This is a URL that points to your application, for instance https://localhost:5001/privacy
- URL for terms of use. This is also a URL that points to your application, for instance https://localhost:5001/tou
- On the left-hand side in the list of steps to complete, select Tabs under Capabilities.
- Click the Add button under Add a personal tab
- Enter the following information
- Name of the tab
- Entity ID of the tab
- Content URL for the tab. In our demo it is available at https://localhost:5001/personal
- Click Save
- In the list of steps to complete, scroll down to Test and distribute under Finish
- Click the Install button, and complete the installation on the dialog shown below.
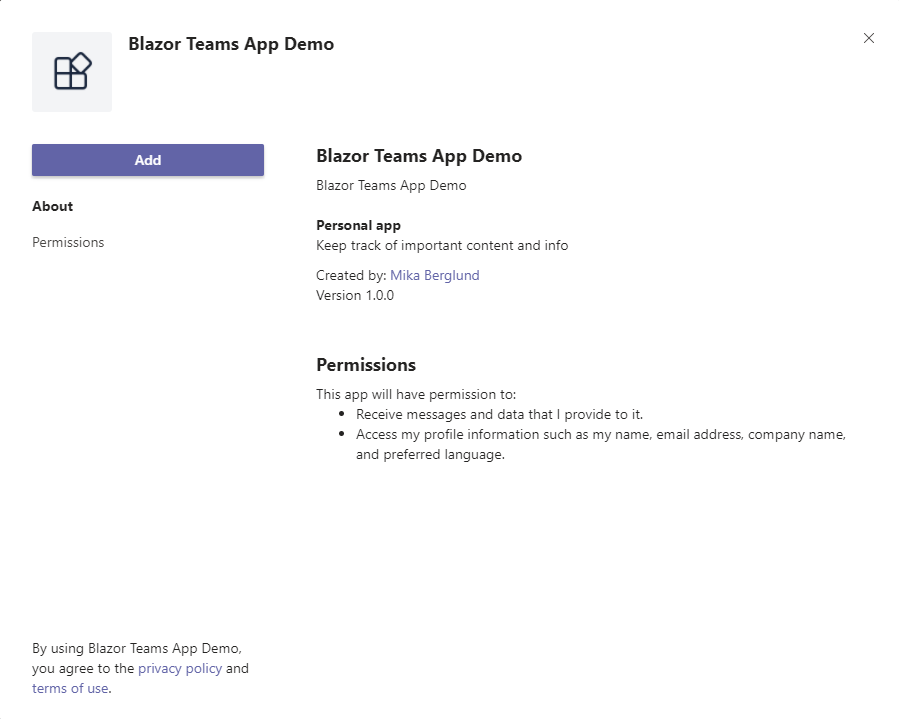
If everything goes as it should, you should shortly have the Blazor Teams App Demo in your Apps panel on the left-hand side in your Teams Client.
Running the Application
Please note that currently, there is a problem in Blazorade Teams that prevents you from running this application in the desktop client. It currently works only in the web client. However, this has been filed as an issue and will be fixed before Blazorade Teams goes stable. I will update this blog article when that happens.
Now you have completed all of the steps necessary, and it’s time to run your application in Teams. Make sure that you have your application running in Visual Studio and that you get the front page loaded, as shown above when we created the application page.
Now, click the application icon in the Apps panel on the left-hand side in Teams. Pretty shortly, you should see something like this.
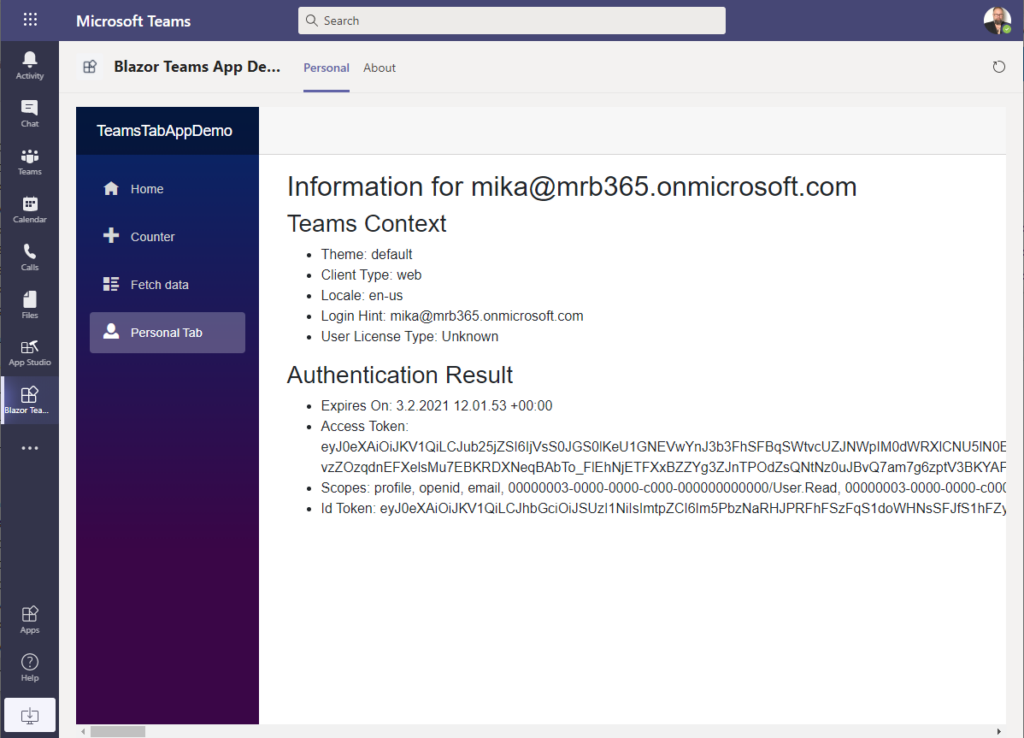
Now of course you wouldn’t want your application to look like this, but you probably get the idea. Hope you got your demo working too. If you have any suggestions to Blazorade Teams, just file an issue and I’ll look into it.
Happy coding!

1 Comment
SharePoint PnP Dev General SIG Call – February 4th, 2021 – Screenshot Summary - Warner Digital · February 4, 2021 at 18:00
[…] https://mikaberglund.com/pnp-dev-general-community-call-demo-feb-4-2021/ […]